I have had a thing about Dunstalls since the time I visited his small shop way back in the late sixties. Just seeing all those cafe racer customizing parts was more than enough to get me hooked. One small problem though was that I was just out of high school with basically zero disposable income, so owning one was not likely to feature in my immediate future.
Over the intervening years I have been fortunate enough to own a Dunstall Commando tank which I fitted to a Honda CB72 racer and a little later a classic Dunstall cafe race fairing came along on a Yamaha twin that I sold because I had no use for it at the time.
Then I found a NOS later square type fairing at a swap meet and the following year a screen turned up and again I had nothing suitable to fit it on, so that was sold as well. I should have realized that a Dunstall was in my destiny.
History
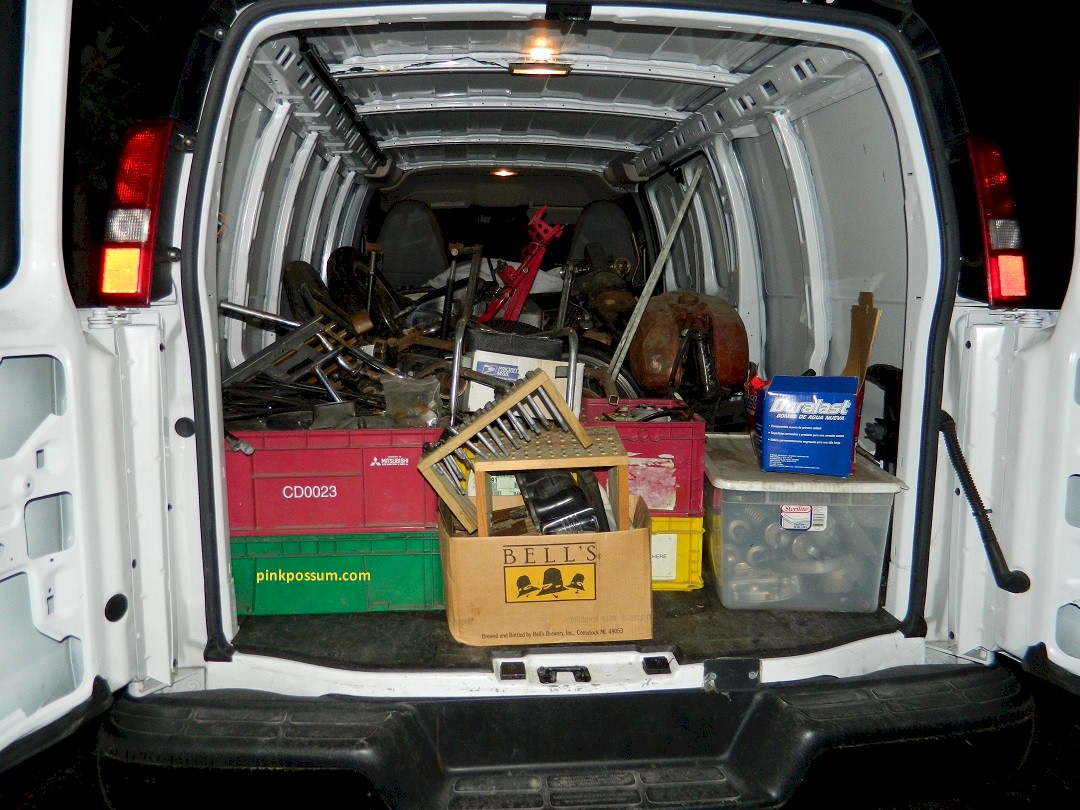
A couple of years ago I was looking for certain GT750 parts to complete a build, and a friend offered me a deal on a whole shed load of parts and complete bikes at a price he knew I could not refuse.
Those parts were all I needed to get this one done - or so I thought.
I started to build it as a basic cafe racer but after a number of different parts were auditioned for the role, I wasn't feeling it. Something wasn't talking to me. It was too ordinary. Too plain. Too generic. Too much the same as every other cafe racer.
I tried different seats and mocked up color schemes and nothing was emerging, until I found a beautifully complete Dunstall body kit, and then it was like someone turned on a light. That was the way to go. Now there was a plan and a road map and a vision of what this bike could become. The butterfly that could emerge from its ugly cocoon.
Chassis
The frame was fine and was cleaned up treated to coat of shiny back paint.
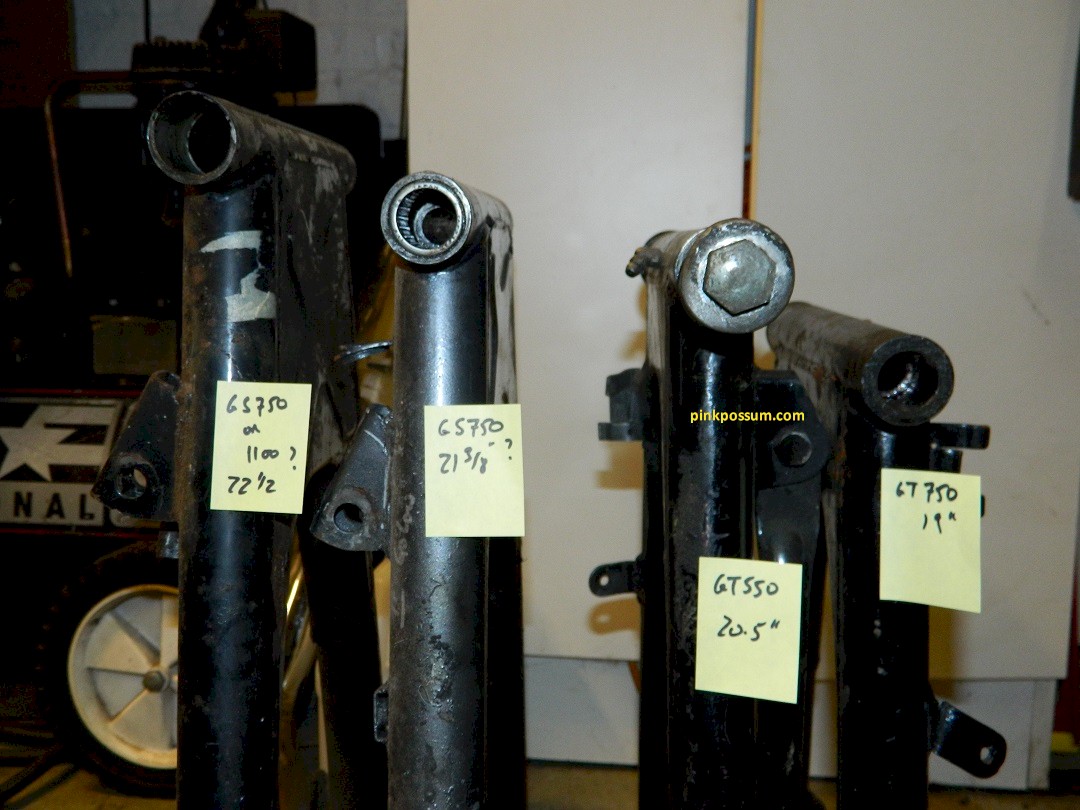
Swingarm was a little more tricky in that the brake torque arm mount on a disk brake GS750 is very different to a GT750, and fortunately in that pile of parts was a swingarm that had already been modified. They were clearly meant to be together. A GS750-1000-1100 swinagarm would also fit straight in but would increase wheelbase and it's long enough already.
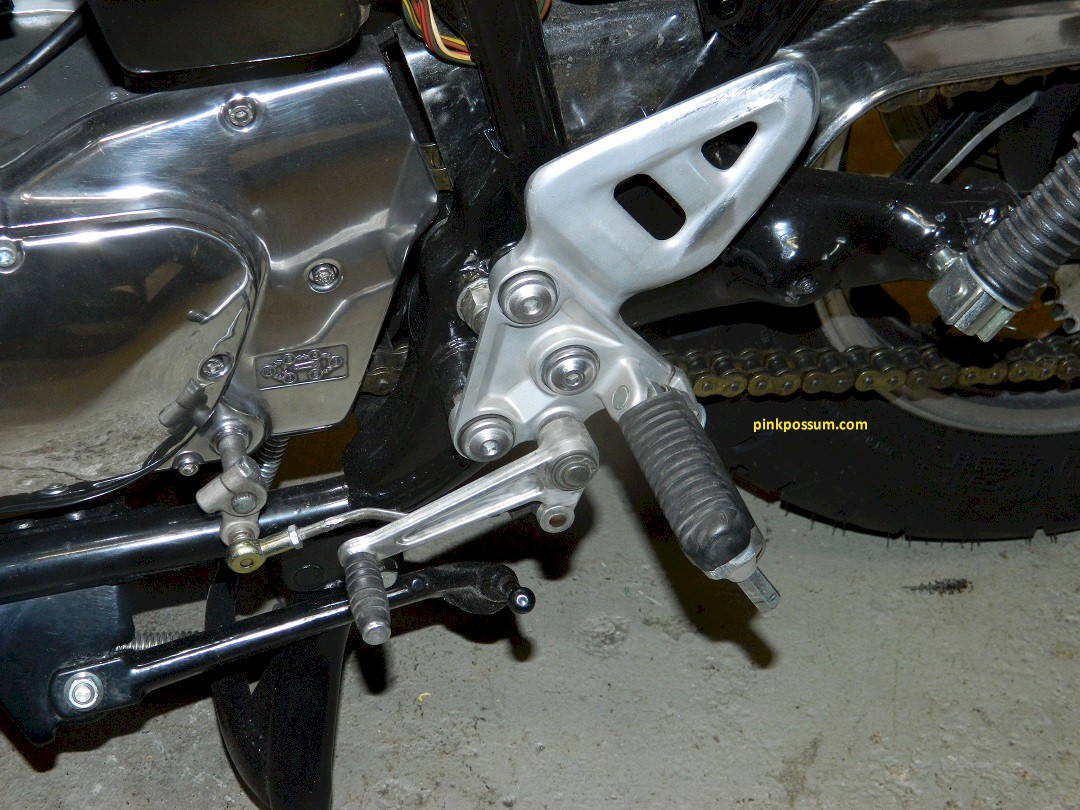

One problem with a Dunstall Suzuki is that Dunstall recommends fitting lower bars to go with the fairing and that's good. But what that misses is a suitable set of footpegs. With lower bars, the riders pegs need to be moved rearwards. Dunstall used to offer rear sets for many models but never for the GT750 and with low bars, the ergonomics suck without a set.
The challenge was to create and fit a set of footpegs that would fit where they needed to be, looked right and most importantly, did not require changes to the stock frame. I need the frame to remain stock so that any future owner could choose to put all stock parts whenever they so desired. Chopping the frame was not an option.
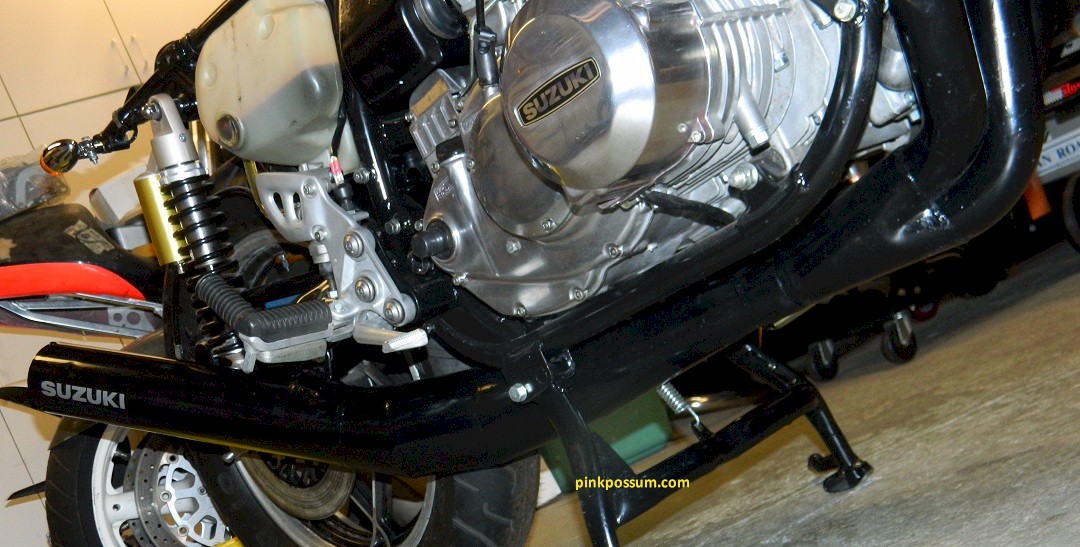
After trying multiple different options from Vortex to custom to GSXR and so on, I settled on a pair of Hyabusa rubber mounted peg assemblies. They required a pair of totally custom adapters to fit to the frame and that worked out nicely. Way too much work and time was spent on the solution, but the end result was well worth that effort.
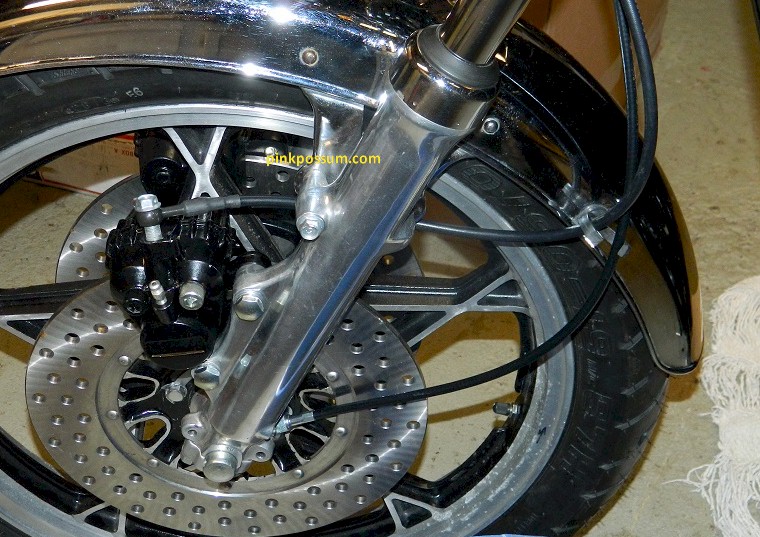
Among that pile of parts was a nice set of GS750 cast wheels that needed some TLC. They were stripped and repainted and fitted with new wheel bearings. Brake calipers and master cylinder were refurbished with new seals and fitted with new black sheathed braided lines.
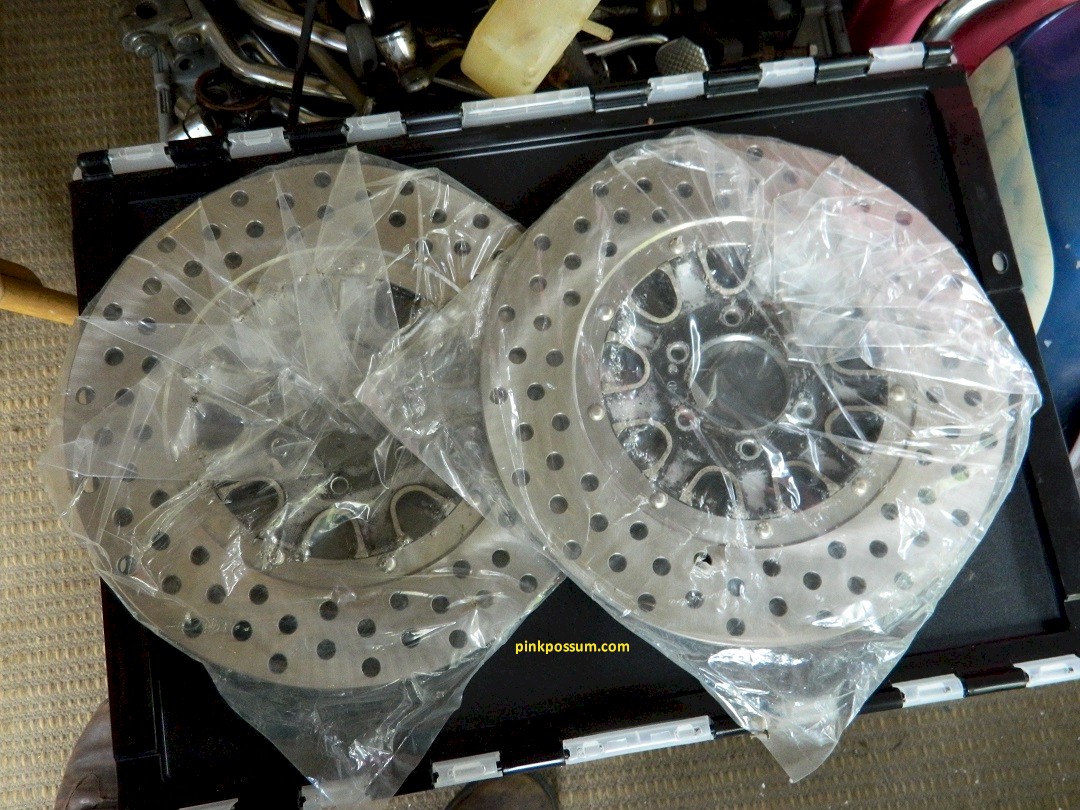
Another great find in those spare parts was a pair of freshly ground and cross drilled disk rotors, so they were fitted along with freshly plated bolts and tab washers.

Forks on a 74 GT750 are one year only. The sliders are unique to that year, but the legs and internals are completely interchangeable with all later years. Why that's important is that 74 models had a waisted fork leg that when exposed looks ugly and with a fairing on, it's not practical to use stock headlamp brackets, and those ugly legs would be exposed. So the forks were stripped and cleaned, and reassembled with 76/77 legs and new seals to go with the polished sliders.
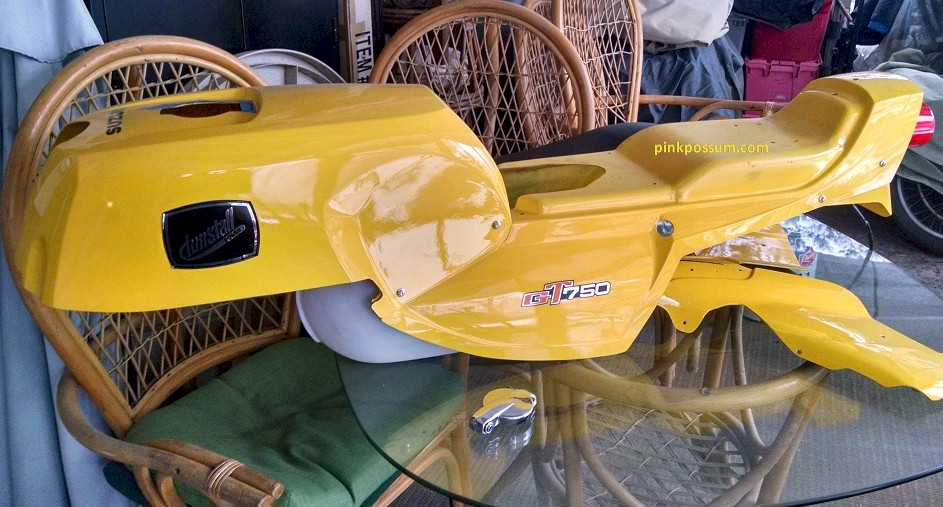

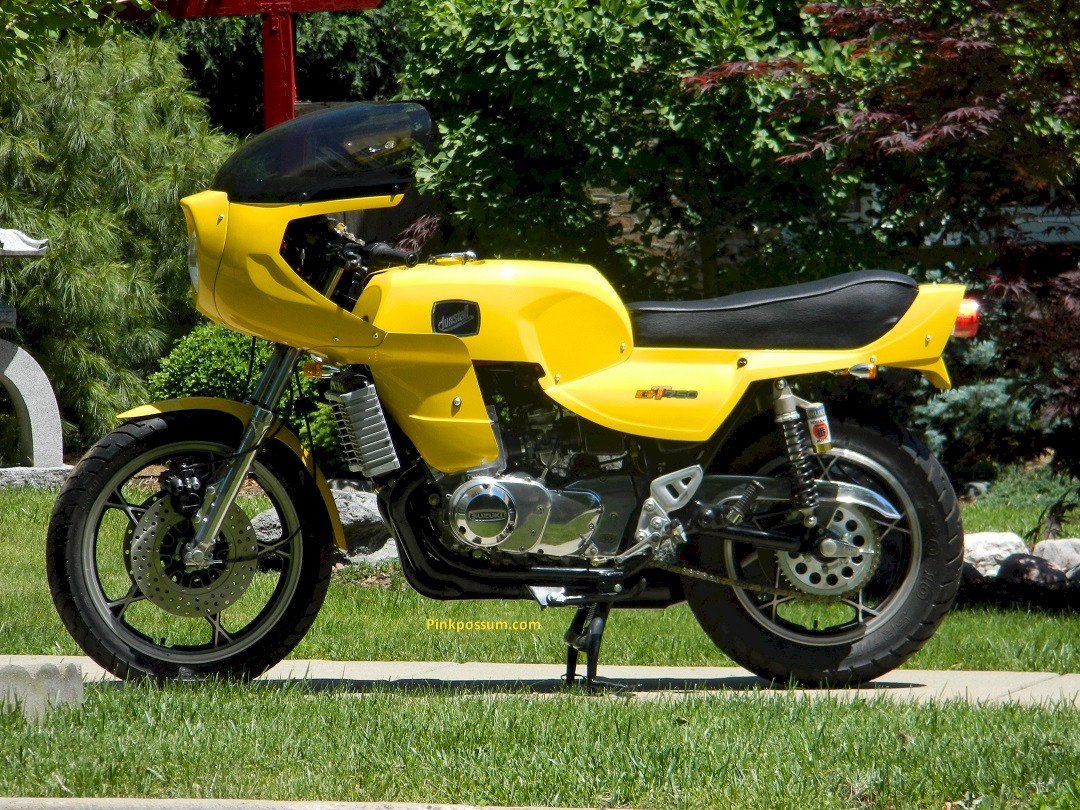
The body kit that arrived in two very large boxes was in great condition with almost flawless yellow gel coat, and that pretty much set locked in the color selection. It needed a couple of small repairs and was then painted and given a clear coat of SprayMax2K.
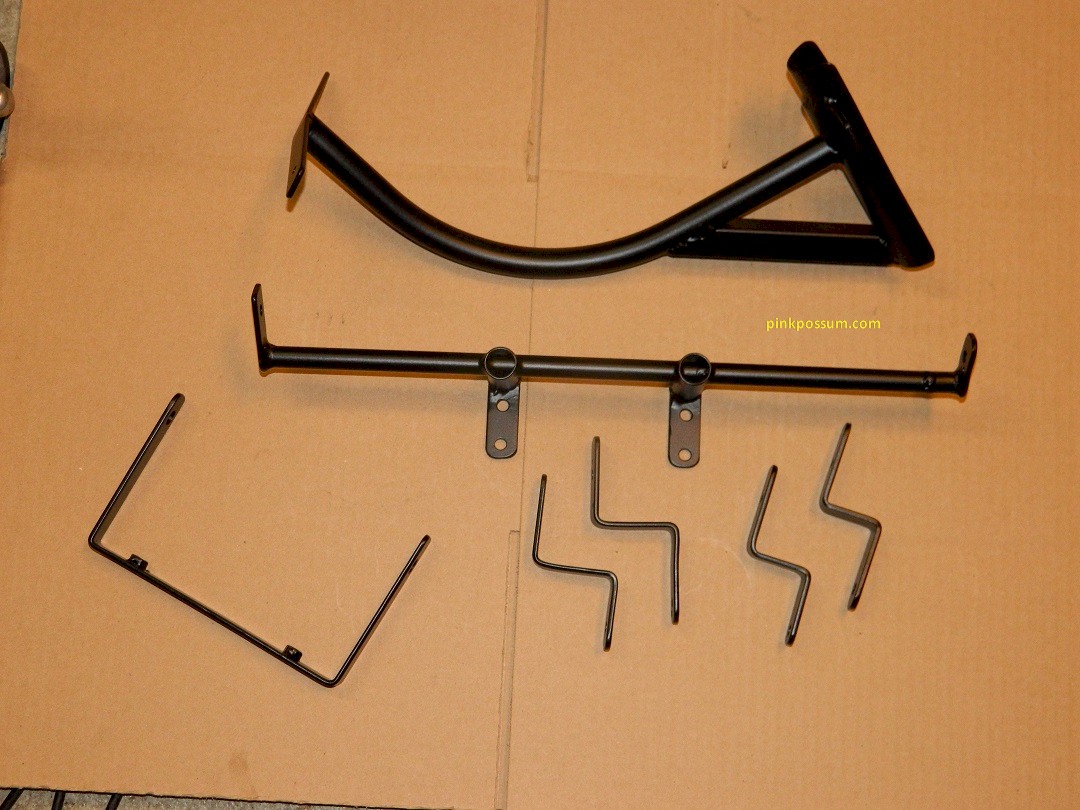
That raised the next question of what the brackets should look like. After zero response from owners of a couple of Dunstall owners , I had to go into full on sleuth mode. I checked web sites and blog postings for pictures from different angles and finally I was able to work out what they should look like and fabricated a set. They are not too complicated but dimensions are critical. After several "almost right" attempts, I fabricated a set that fit perfectly, they were sent out for a nice smooth coat of black satin powdercoat.
I didn't much care for the under tank Dunstall fairing mount design so I designed one that would bolt to the old fan mounts on the frame. It's more rigid that the original and less obtrusive, so that has to be a win-win.
One poor aspect of the Dunstall seat-side cover design is that the electrics on the left side are not well covered and are somewhat exposed to the elements. Stock GT750 frame side covers are too wide and too long to fit under the slender Dunstall bodywork, so we fabricate a 4" shorter, 3" slimmer fiberglass version of the stock side cover and that neatly protects those new connectors.
All the old hardware was thrown into the recycling bucket and were replaced with new alloy cap screws and alloy nyloc nuts
.JPG)
The front fairing mount now tries to occupy the same space as the back of the headlamp shell, so something had to give. The shell was cut down to make room for things.
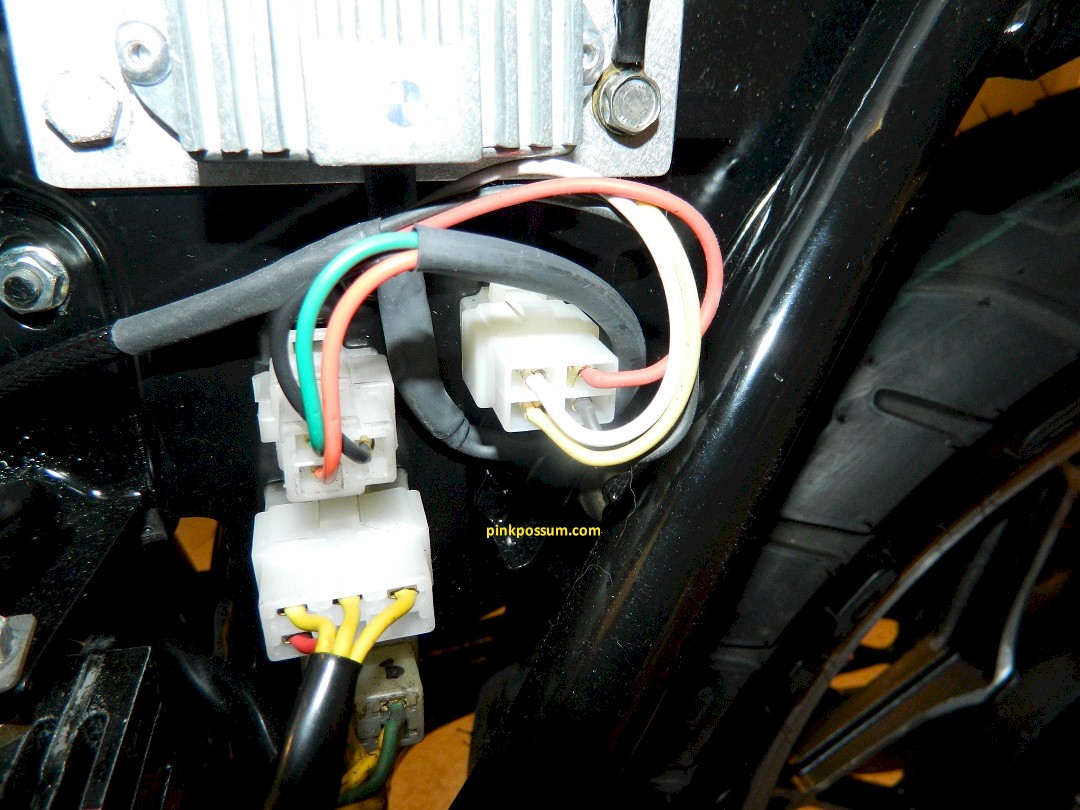
While the wiring was being cleaned up it made sense to fit a pair of relays to the headlamp circuits to reduce electrical load on the new replacement left bar switch. I also fitted a UK style bar switch with an OFF position for the lights to reduce electrical load when starting.
Winkers were replaced with neat little LED bullets and a new LED compatible relay was fitted. While I was in the electrical system it seemed like a good idea to fit a relay to the ignition circuit with its own new fused power supply.
With all those new electrical parts already fitted, old points were just not going to cut it, so a new reliable, solid state ACCENT ignition system was slipped under the points cover and a solid state regulator was fitted along with new connectors to make sure those overworked electrons could get to where they were supposed to be going.
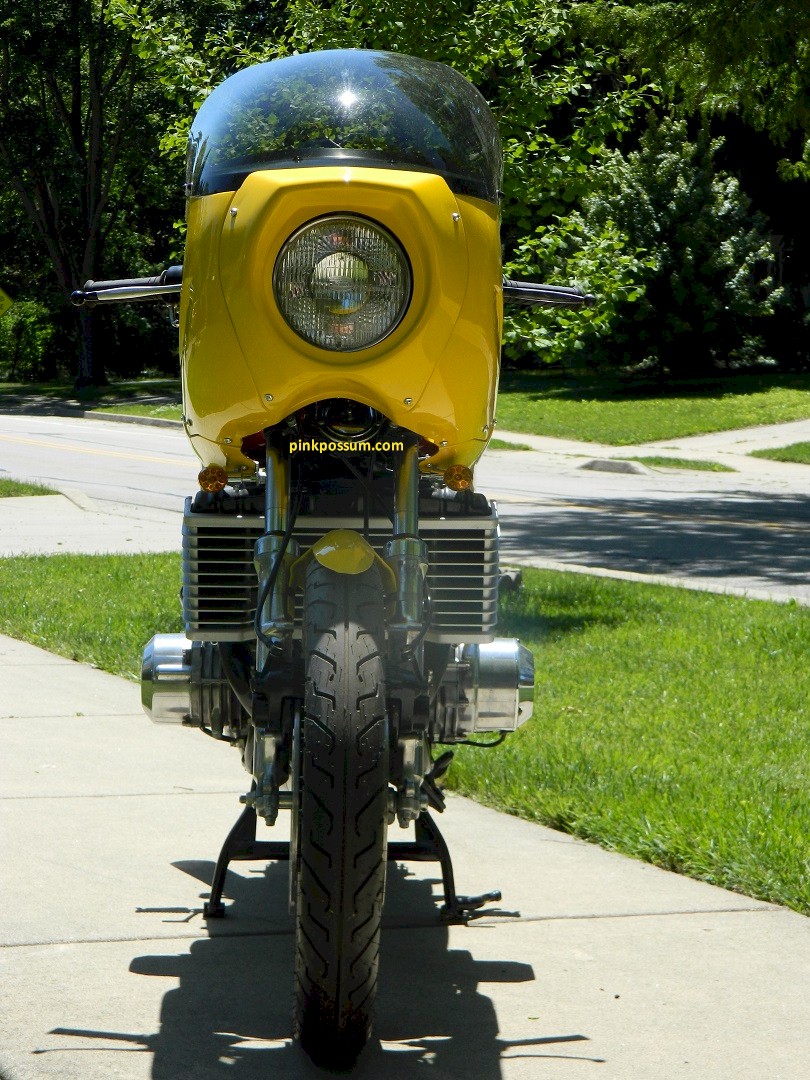
A new dark smoke color screen for the fairing was obtained to add that finishing touch to the fairing. Anyone that has ever fitted a fairing will tell you how hard it is to get it all straight and have the screen not look lopsided.
If the fairing is anything less than perfectly square top to bottom and side and side it will look terrible. So many come out of a bent or twisted mold or are stored in less than perfect conditions. This one was as close to perfect as possible and is a tribute to the designer and people who made bodywork for Dunstall.
Fortunately a laser level made the fitting task easier and the structural rigidity of the upper fairing design was a big help. This is probably the straightest full fairing I have fitted.
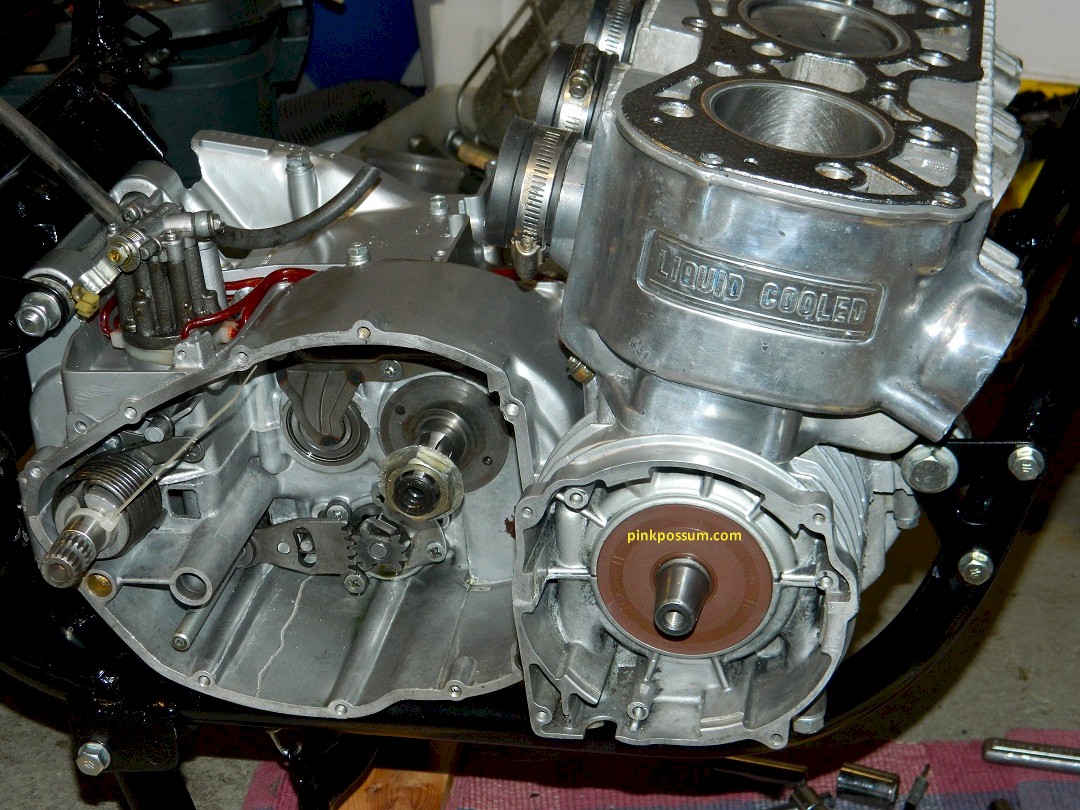
Motor
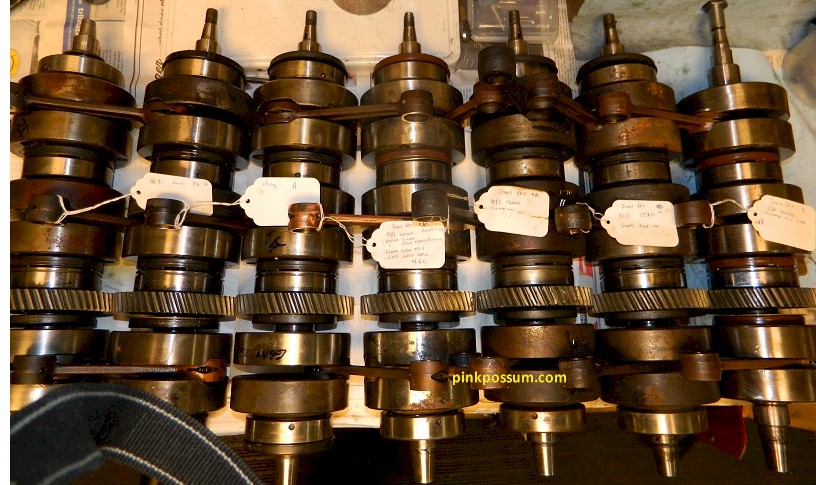
The motor that was fitted when it arrived, was in serious need of help and as with all bikes I rebuild, the motor was completely stripped, cleaned and inspected. Other than a junk crank, rusty bores, and other parts in dubious condition, it was as good a place to start as any. A suitable crank was selected and sent out to Bill Bune in MN for a complete rebuild with new seals and any parts that were less than perfect were replaced.
Crankcases were in excellent condition which is relatively unusual. I have rebuilt several GT750s and they often have cracks or chunks missing from flying chains, but this set was really nice. Cases were cleaned, threads cleaned faces cleaned up and the top case half given a fresh coat of paint.
Transmission was good, and so was the clutch assembly but the pull rod and clutch plates had to be replaced.
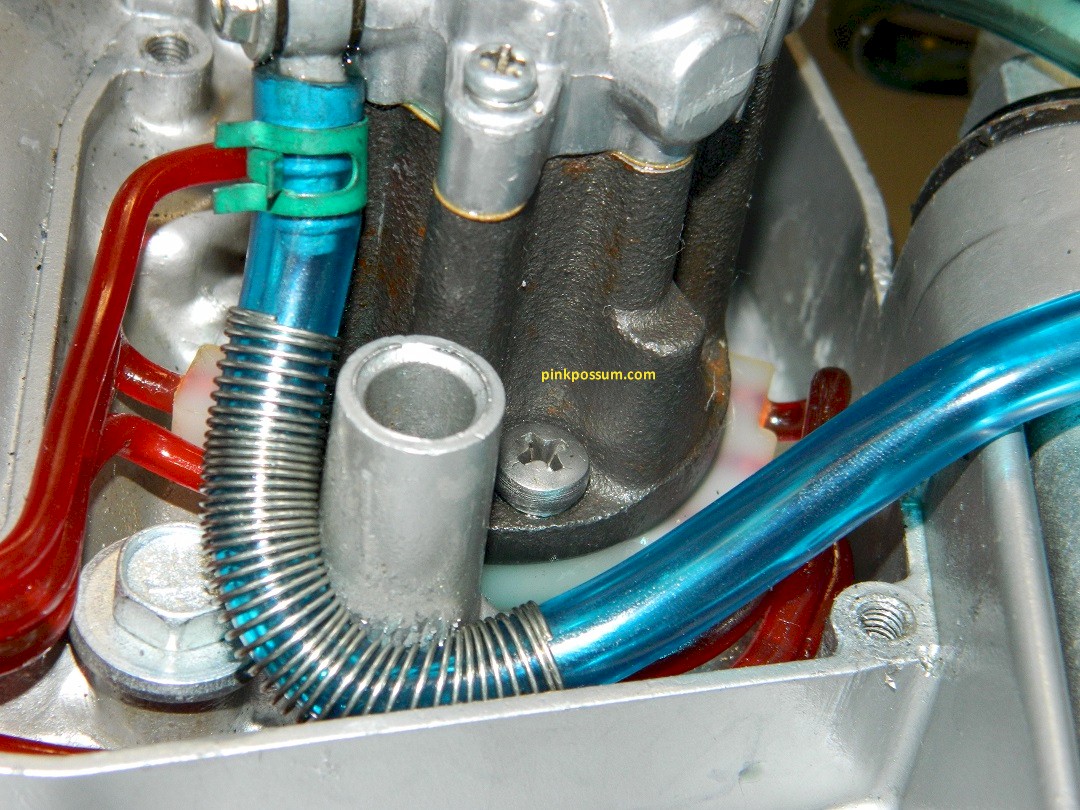
Oil and water pumps were refurbished with new seals including the graphite faced mechanical seal and O rings were fitted along with new gaskets and oil feed lines.
A common cause of oil shortage on the GT750 was where the oil feed pipe snaked around teh breather tower. They were often pinched or collapsed in that are. Our fix is to wrap the feed line with a closely wound thin wire spring that prevents the pipe from collapsing.
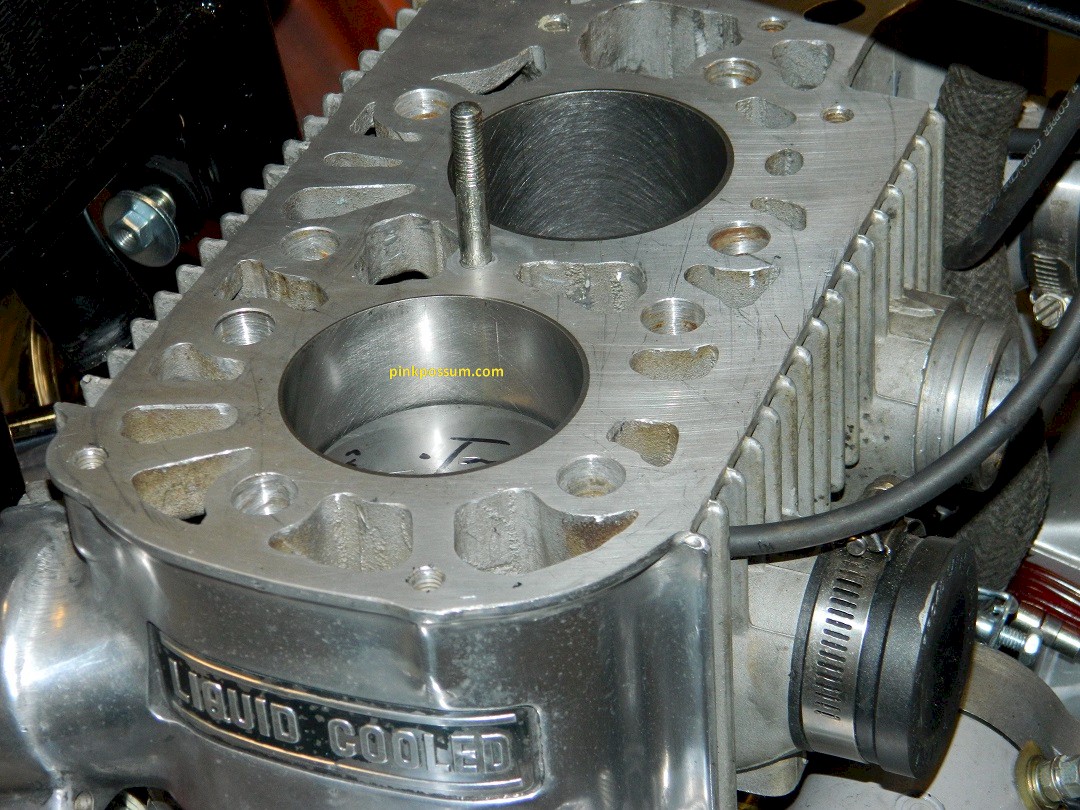
Barrels were lightly ported to clean up casting flaws and the top and bottom surfaces were faced to ensure the block and head are air tight. Barrels were rebored and honed to fit the new WISECO pistons and rings and ports were chamfered. Then the SZRZIS system was blanked off to prevent oil and air leaks. SRIS was designed to reduce smoking with the oils available back then. With modern low smoke, low ash oils that system is not required and is just another bunch of places that could cause leaks.
Head was also lightly skimmed to ensure flatness.
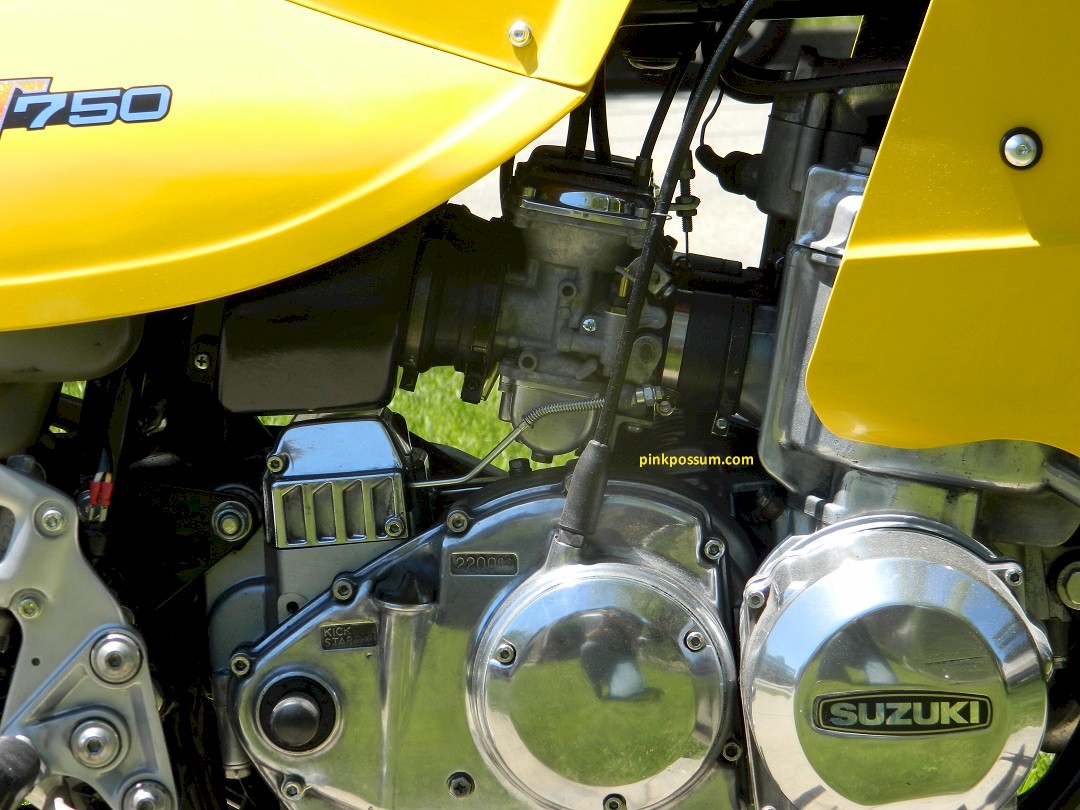
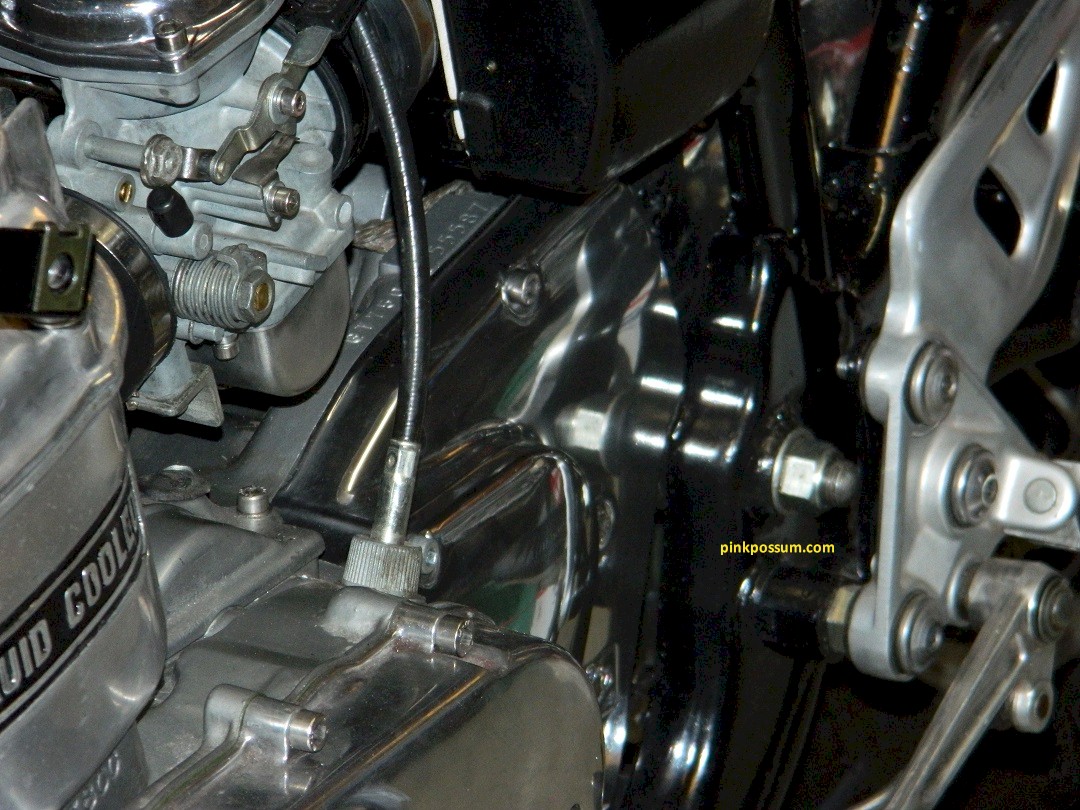
Carbs were completely stripped, cleaned inside and out, and were rebuilt with fresh gaskets, brass and stainless or re-plated zinc hardware. Stock air box was fitted with a new air filter, seals, cables and rubbers.
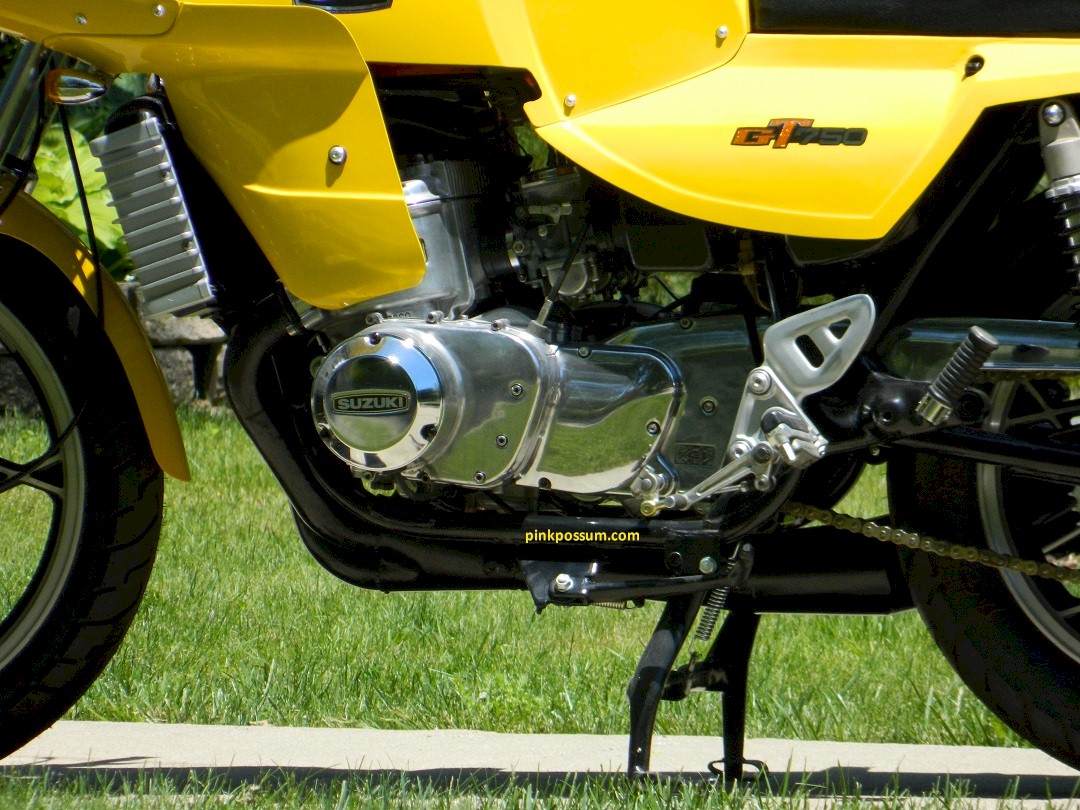
Outer engine covers were all cleaned and polished and fitted with new gaskets and a new ignition cover. New decals were attached to both outer covers.
Much as I like separate expansion chamber exhausts, they tend to be noisy and not many are a shape that complements the styling. I tried Jemco, as well as period Bassani and J&R Power Pipes and they all looked wrong.
Luckily I found an Omar's Torque Canon set of 3 into 1 pipes in near perfect condition, made by Jemco I believe. They just sound right for this bike and look perfect. Reasonably quiet and with that smooth tone, they could not fit any better. Perfect.
For more details email: teazer "at" pinkpossum 'dot' com
Click on the thumbnails to see the larger pictures